
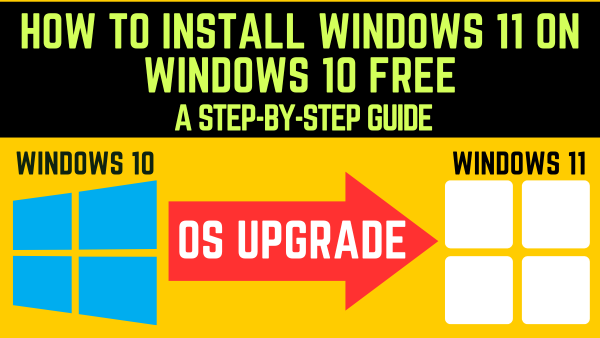
How to Install Windows 11 on Windows 10 Free: A Step-by-Step Guide
Introduction
Windows 11 is the latest operating system from Microsoft, offering a refreshed user interface, improved performance, and new features. If you’re currently using Windows 10 and want to upgrade to Windows 11, this How to Install Windows 11 on Windows 10 Free step-by-step guide will walk you through the installation process. Please note that before proceeding, you should ensure your device meets the system requirements for Windows 11.
Step 1: Check System Requirements:
1.1. Verify that your computer meets the minimum system requirements for Windows 11. These requirements typically include a compatible processor, a certain amount of RAM, and sufficient storage space. Visit Microsoft’s official website to review the system requirements.
Hardware requirements
To install or upgrade to Windows 11, devices must meet the following minimum hardware requirements:
-
Processor: 1 gigahertz (GHz) or faster with two or more cores on a compatible 64-bit processor or system on a chip (SoC).
-
Memory: 4 gigabytes (GB) or greater.
-
Storage: 64 GB or greater available disk space.
Note
There might be more storage requirements over time for updates, and to enable specific features within the OS. For more information, see Windows 11 specifications.
-
Graphics card: Compatible with DirectX 12 or later, with a WDDM 2.0 driver.
-
System firmware: UEFI, Secure Boot capable.
-
TPM: Trusted Platform Module (TPM) version 2.0.
-
Display: High definition (720p) display, 9″ or greater monitor, 8 bits per color channel.
-
Internet connection: Internet connectivity is necessary to perform updates, and to download and use some features.
- Windows 11 Home edition requires an internet connection and a Microsoft Account to complete device setup on first use.
For more information, see the following Windows Insider blog post: Update on Windows 11 minimum system requirements.
For more information about tools to evaluate readiness, see Determine eligibility.
OS requirements
Eligible Windows 10 devices must be on version 2004 or later, and have installed the September 14, 2021 security update or later, to upgrade directly to Windows 11.
Note
- S mode is only supported on the Home edition of Windows 11.
- If you’re running a different edition of Windows in S mode, before upgrading to Windows 11, first switch out of S mode.
- To switch a device out of Windows 10 in S mode also requires internet connectivity. If you switch out of S mode, you can’t switch back to S mode later.
Step 2: Check Compatibility with Windows 11:
2.1. Download Microsoft’s PC Health Check tool from their website.
2.2. Run the tool and allow it to scan your system.
2.3. The tool will inform you whether your device is compatible with Windows 11. If it is, proceed to the next step. If it isn’t, you may need to consider upgrading your hardware.
Step 3: Backup Your Data:
3.1. Before making any changes to your operating system, it’s crucial to back up all your important files, documents, and settings.
3.2. Create a backup on an external hard drive, cloud storage service, or another computer to ensure your data remains safe.
Step 4: Prepare Installation Media:
4.1. Go to the official Microsoft website and search for the Windows 11 ISO file.
4.2. Download the Windows 11 ISO file, which will be used to create a bootable USB drive for the installation.
4.3. Once the download is complete, insert a USB drive with at least 8GB of storage capacity.
Step 5: Create a Bootable USB Drive with Rufus:
- To Download Rufus’s Latest Version, Click below Download Button
5.1. Download and install the Rufus tool, a popular application for creating bootable USB drives.
5.2. Open Rufus and select the USB drive you inserted.
Create a Bootable USB drive with Rufus
5.3. Under “Boot Selection,” click on the “Select” button and browse to the location where you downloaded the Windows 11 ISO file.
5.4. Click on the “Start” button, and Rufus will create a bootable USB drive using the Windows 11 ISO file.

Step 6: Install Windows 11:
6.1. Restart your computer and enter the BIOS settings. The key to access the BIOS settings may vary depending on your computer manufacturer (common keys are Del, F2, F10, or Esc).
6.2. In the BIOS settings, navigate to the “Boot” tab and set the USB drive as the primary boot device.
6.3. Save the changes and exit the BIOS settings. Your computer will restart.
6.4. The Windows 11 installation process will begin. Follow the on-screen instructions to select your language, time zone, and keyboard layout.
6.5. When prompted, choose the option to perform a clean installation (which will remove Windows 10) or upgrade your existing Windows 10 installation. Select the appropriate option based on your preferences.
6.6. Windows 11 will then be installed on your computer. The installation process may take some time, so be patient.
6.7. Once the installation is complete, follow the setup wizard to customize your settings, such as signing in with your Microsoft account, privacy preferences, and personalization options.
Conclusion
By following these step-by-step instructions, you can upgrade your existing Windows 10 installation to the latest operating system, Windows 11. Remember to back up your important data before proceeding with the installation to avoid any potential loss. Enjoy the latest version of Windows 11 user experience from Microsoft.
Latest articles
-

Sony ZV-E10 Key Features for Content Creators
Israr Ahmed
August 9, 2023
ReviewsIn the dynamic world of content creation, having the right tools can make all the difference. Sony, a renowned leader in camera technology, has once.
-

What is Cybersecurity Insurance: Protecting Your Business in the Digital Age
Israr Ahmed
August 5, 2023
GuideIn the modern interconnected world, where digital technologies drive businesses and transactions, cybersecurity has become a critical concern. Cyber threats continue to evolve, leaving organizations.
-

Unleashing the Future of Cloud Computing: A Comprehensive Guide to the Google Cloud Conference
Israr Ahmed
July 26, 2023
GuideIn the ever-evolving world of technology, cloud computing has emerged as a driving force behind innovation, efficiency, and scalability. As one of the leading providers.
-

How to Make Adsense Account with Blogger in 7 Steps Easily
Israr Ahmed
July 25, 2023
How toAre you a blogger looking to monetize your content and earn money through advertising? Google AdSense offers a straightforward way for bloggers to generate revenue.
-

How to Create Strong Passwords on iPhone: 10 Steps Guide
Israr Ahmed
July 23, 2023
How toIn today’s digital age, securing our personal information is of utmost importance. With the majority of our lives stored on our smartphones, ensuring a strong.
-

How to Remove Ads from App: 4 Easy Methods
Israr Ahmed
July 23, 2023
How toHow to Remove Ads from App Tired of pesky ads popping up in your favorite apps? It’s frustrating when you’re engrossed in a game or.
-

Do you know the benefits of cinnamon?
Pawan Mukhtiar
July 22, 2023
GuideIntroduction: Cinnamon is the most used spice in garam masala, which has been used as a medicine since ancient times due to its numerous health.
-

Adopt 14 tips to forget gas pain.
Pawan Mukhtiar
July 22, 2023
GuideStomach problems also make a person anxious. Stomach gas is a common problem that many people worry about. Following are 14 ways you can get.
-

7 rupees increase in the price of electricity.. How much electricity will be available per unit now?
Pawan Mukhtiar
July 22, 2023
News7 rupees increase in the price of electricity.. How much electricity will be available per unit now? The people who are suffering from financial problems.
-

The drama serial Mere Paas Tum Ho will now be aired on Indian TV
Pawan Mukhtiar
July 22, 2023
MovieThe drama serial Mere Paas Tum Ho will now be aired on Indian TV This drama was aired on a Pakistani TV channel in 2019.


